Setting up a Live Linear Channel Tutorial
Goal: Learn how to stream a live linearRepresents a timeline that identifies content and when it should be played. This allows content to be streamed to viewers according to a predefined schedule. feed.
Alternatively, stream a single live eventBroadcasts a live feed of an event (e.g., concerts, lectures, or sporting events). A live event differs from live linear streaming in that it is designed to end once the event is over. by taking advantage of our live event streaming capabilities.
Software Prerequisites:
- Linux
Knowledge Prerequisites:
- Basic understanding of Linux
Key Steps:
- Create a live channelA live channel represents a live linear stream that adheres to a timeline that identifies content and when it should be played..
- Install, configure, and start the Live SlicerThe Live Slicer is a Linux daemon that captures content via SDI, UDP, or RTMP, encrypts it, and then uploads it for encoding. This tool is instrumental when streaming a live linear feed or a live event..
- Capture media.
- Test playback.
Step 1 - Set Up an Account and Sign in
An account is required to stream content via our service.
Sign in to the CMS.

Step 2 - Create a Live Channel
A live channelA live channel represents a live linear stream that adheres to a timeline that identifies content and when it should be played. determines how content generated by a Live Slicer will be made available to viewers.
From the Streaming section of the CMS, navigate to the Live Channels tab.
Click +Channel from the bottom-left hand corner of the CMS.
In the Channel Name option, type the name that will be assigned to the live channel.
In the Slicer ID (Optional) option, type the alphanumeric ID that will be assigned to the live channel.
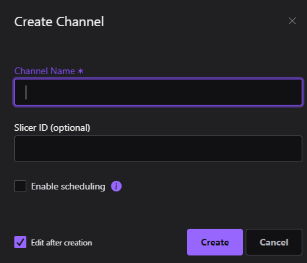
Optional. Set channel options:
• Check the Enabling Scheduling option to use the advanced scheduling interface and the latest channel APIs.
• Tick the Edit after creation box to open the record after submitting.
Click Create.
Step 3 - Install the Live Slicer
Install the Live Slicer on a Linux computer.
View minimum system requirements.
If you plan on using a Blackmagic DeckLink SDI capture card, then the Live Slicer must be installed on the computer where that card is housed.
Live Slicer version 21092100 or higher: Install the libnl-3.200 library.
Command:
sudo apt install libnl-3-200
Python and bzip2: Install the python bzip2 applications.
Command:
sudo apt install python bzip2
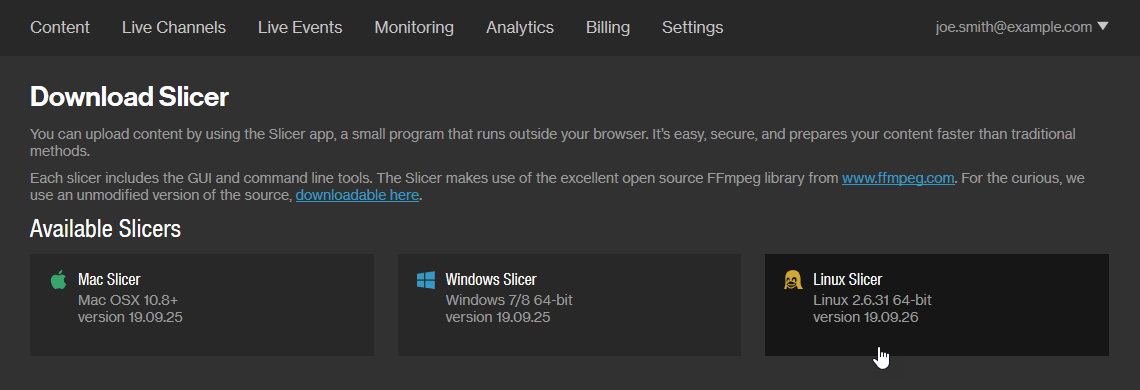
Download the Live Slicer by clicking Downloads from the bottom right-hand corner of the CMS and then clicking on the desired OS.
Extract the zip file to the desired directory.
Command:
$ tar -xvf uplynk_slicer_linux_64-231114.04.01.tbz2
...
uplynk_slicer_linux_64-231114.04.01-master/
uplynk_slicer_linux_64-231114.04.01-master/slicebot.cfg.example
uplynk_slicer_linux_64-231114.04.01-master/libfreetype.so.6
uplynk_slicer_linux_64-231114.04.01-master/libavcodec.so.57
uplynk_slicer_linux_64-231114.04.01-master/libcares.so.2
uplynk_slicer_linux_64-231114.04.01-master/slicer
uplynk_slicer_linux_64-231114.04.01-master/example.conf
uplynk_slicer_linux_64-231114.04.01-master/libcrypto.so.1.0.0
uplynk_slicer_linux_64-231114.04.01-master/libssl.so.1.0.0
uplynk_slicer_linux_64-231114.04.01-master/liveslicer
uplynk_slicer_linux_64-231114.04.01-master/font_i420.dat
uplynk_slicer_linux_64-231114.04.01-master/libavfilter.so.6
uplynk_slicer_linux_64-231114.04.01-master/ca-bundle.crt
uplynk_slicer_linux_64-231114.04.01-master/install_live
uplynk_slicer_linux_64-231114.04.01-master/libswscale.so.4
uplynk_slicer_linux_64-231114.04.01-master/libswresample.so.2.4.100
uplynk_slicer_linux_64-231114.04.01-master/libbeam-slicer.so
uplynk_slicer_linux_64-231114.04.01-master/libopus.so.0
uplynk_slicer_linux_64-231114.04.01-master/libopus.so.0.5.0
uplynk_slicer_linux_64-231114.04.01-master/LICENSE.txt
uplynk_slicer_linux_64-231114.04.01-master/slicebot
uplynk_slicer_linux_64-231114.04.01-master/README.html
uplynk_slicer_linux_64-231114.04.01-master/libavformat.so.57
uplynk_slicer_linux_64-231114.04.01-master/libavformat.so.57.58.101
uplynk_slicer_linux_64-231114.04.01-master/libavutil.so.55
...
Navigate to the newly created directory.
Command:
$ cd uplynk_slicer_linux_64-231114.04.01-master/
Run install_live.
Command:
$ sudo ./install_live
Step 4 - Configure the Live Slicer
Define Live Slicer settings within the Live Slicer configuration file.
Open /etc/uplynk.conf in a text editor.
Set the username setting to the email address associated with your account.
If present, delete the password line.
If missing, add a line for the apikey setting. Set it to your secret API key.
- Navigate to the Integration Keys page by clicking the Settings tab and then clicking Integration Keys from the side navigation tab.
- Your API key(s) are listed under the API Keys section.

Set the slicerID setting to the case-sensitive slicer ID assigned to the channel in step 2.
Set the card setting to the number assigned to the Blackmagic capture card that will generate the source feed.
Step 5 - Start the Live Slicer
Start or restart the Live Slicer whenever you modify the Live Slicer configuration file.
Start the Live Slicer using one of the following commands:
upstart:
systemd:
Step 6 - Start Audio/Video Capture
Set up the Blackmagic capture card to capture the audio/video feed.
Connect an audio and video source to the Blackmagic capture card.
Open Blackmagic system preferences (![]() How?) and then configure the above connections as input sources.
How?) and then configure the above connections as input sources.
Open Preferences (Edit>Preferences) and then set a project format, capture file format, and storage location.
Close Preferences and click on the Log and Capture tab.
Click Capture. The Live Slicer will automatically pick up the feed.
Step 7 - Test the Live Linear Stream
Congratulations on successfully creating and broadcasting a live linear feed. It is now time to test the stream through the test player provided from the CMS.
A link to a test media player that has been exposed to unauthorized individuals may be invalidated at any time by clicking the ![]() icon within the live channel's Test Players (Warning: Restriction free) section.
icon within the live channel's Test Players (Warning: Restriction free) section.
From the Live Channels tab in the CMS, make sure that the live channel is selected.
Click the Playback tab.
From the Test Players section, follow the View link corresponding to the desired test player.

Please refer to our media player tutorials to learn how to create a media player and our security tutorials to learn how security may be integrated with content playback.